1996 Saturn SC2 - Valve cover and gasket job with oil change
A while ago, I had some serious engine rocking problems and misfires happening with my car. The end result was a $700 repair bill at a local mechanic. Part of the repair work about $150 of it, was for replacing the valve cover gasket. Well, a few months after it was done, it started leaking oil and over the past 6 months it started leaking really bad, causing oil to leak down onto the exhaust manifold and cause grey smoke to come out from under the hood on a daily basis. Seeing as the valve cover already had a new gasket and still leaked, I figure the valve cover itself needs to be replaced as it has become warped with heat and/or damaged somehow.
I went to the local pick n pull and found the only saturn that had the same valve cover as mine. I lucked out pretty good. I have pictures of the valve cover before and after cleaning and what the factory gasket (black gasket) looks like. Maybe I'll post those pictures in another blog entry. But why did I buy the valve cover at the scrap yard? Because it only costed $11 compared to the close to $400 the dealership wants.
This tutorial isn't completely in-depth on how to change a valve cover gasket but it does cover all the steps. All I can say is that for a saturn, it is easier to change your valve cover than to change your front brake calipers and bleed the brake lines.
1) First off, drive the car up onto car ramps (not those shitty plastic ones, unless you want a car to fall on your head), put an oil drain pan under the oil pan, drain the oil by removing the oil pan plug, then remove the oil filter and also let that drain. Then screw back on your oil pan plug and put on a new oil filter. I have no pictures of doing all that. X'D
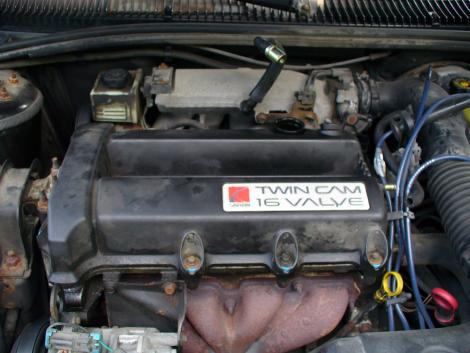
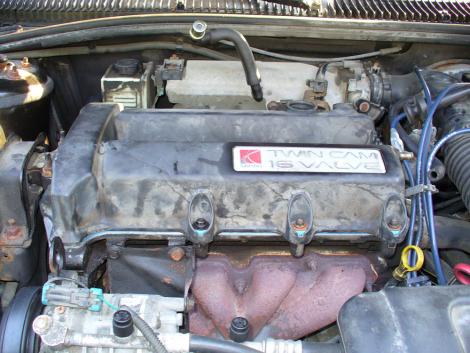
2) Disconnect your battery at the negative terminal. Now you'll want to mark the number order of your spark plug boots with duct tape and pull them out and set them to the side. Then disconnect the hose and unplug the pcv valve from the valve cover.
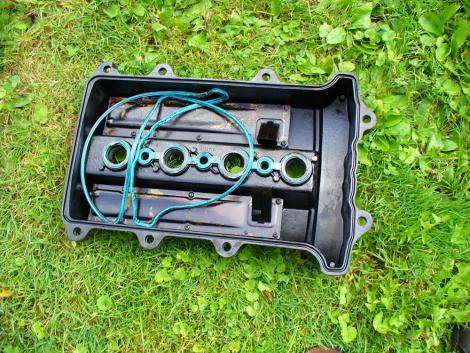
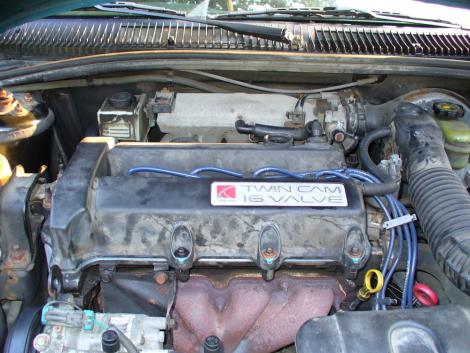
3) Now you'll remove the bolts holding the valve cover on. I would take them off in the order as specified in the haynes/repair manual. Then take the valve cover off, be careful, its an oily mess. The old gasket should come off rather easy, but you might have scrape the gasket off the manifold or valve cover, if any rtv was used. This is a picture of the old valve cover and gasket (the gasket is blue).
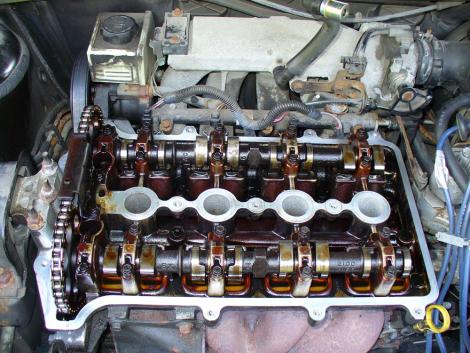
4) Here is a picture of the engine head after I cleaned it. You have to have a clean oil free surface for your gasket or else it will leak. I used Brakekleen and a rag.
5) Here is another angle. I'm posting these next couple pictures because I didn't know where I was supposed to apply the rtv when replacing the gasket. All over the internet, people would say "where the timing chain cover meets the head." or "on the timing chain T-joints."
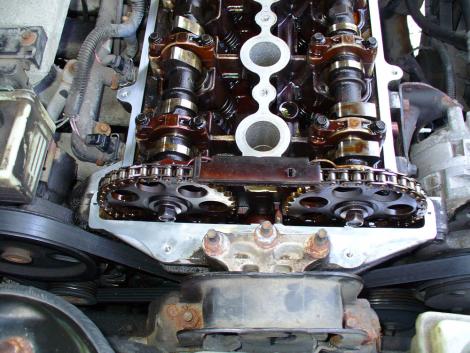
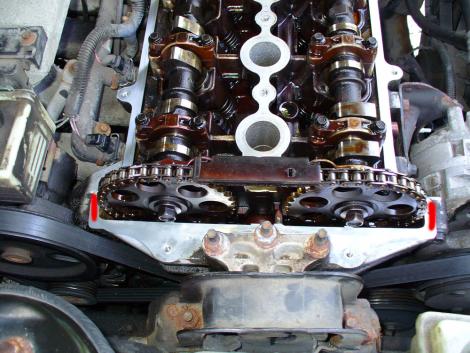
6) Which are right here. I felt stupid. I've never messed with engines before and I didn't realize that the timing chain had its own cover that covered a large chunk of the engine on the passenger side.
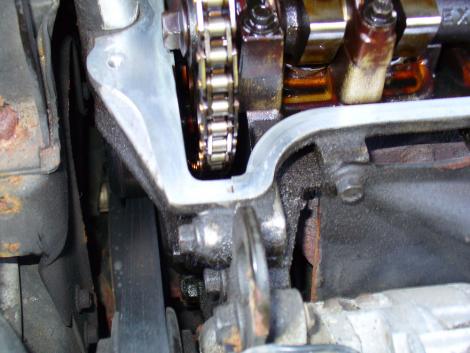
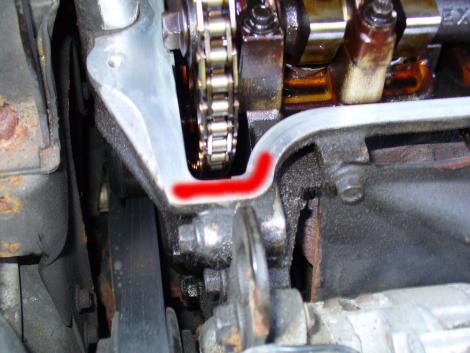
7) Here is another angle. If you can make it out from my blurry picture, there is a slight recess in this joint. That is what you want to definitely be filled in with rtv. When I applied rtv, I smeared it on with my thumb and made sure air didn't get trapped in it. Now remember, do not apply rtv until you are ready to put the valve cover on and tighten all the bolts! rtv sets very fast and you don't want to have it harden up before you put everything back together.
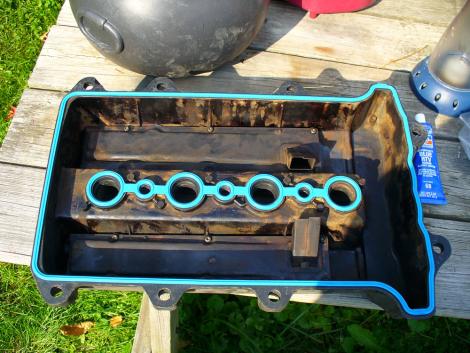
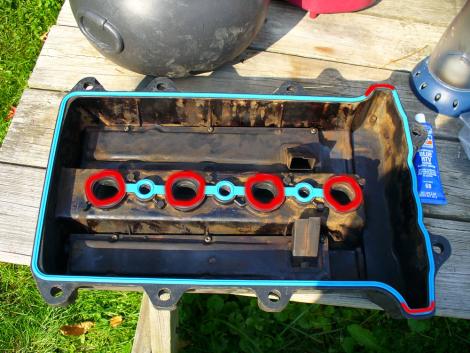
8) This is the new slightly used valve cover from the scrap yard. I cleaned it quite a bit with engine degreaser and then with brakekleen the day before and then let it thoroughly dry. The gasket easily fits snug into the valve cover's grooves.
9) These are the locations where I put a small amount of rtv to make sure I got a good seal. I also applied rtv to the engine head at the same spots so the rtv will grab itself when I put the valve cover on.
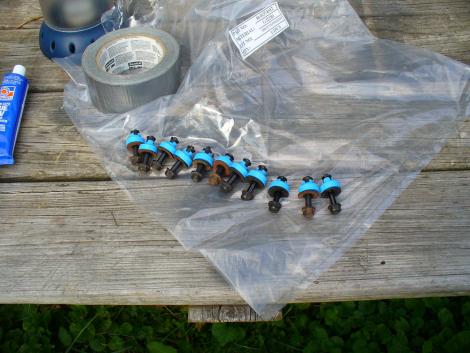
10) And here is a picture of the valve cover bolts with their little gaskets on them. Remember to keep all the gaskets oil free!
11) Now apply your rtv on those spots I pointed out, (I used the blue rtv), and then very carefully place the valve cover back on, without smudging your rtv! and then put the bolts back on by hand at first and then follow the tightening sequence as shown in your repair manual.
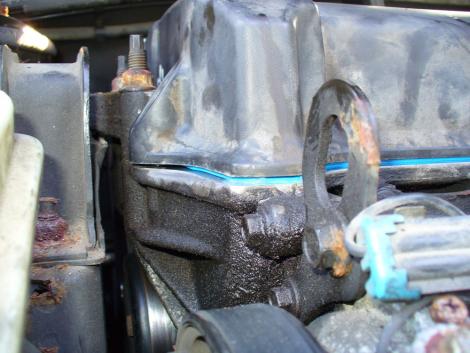
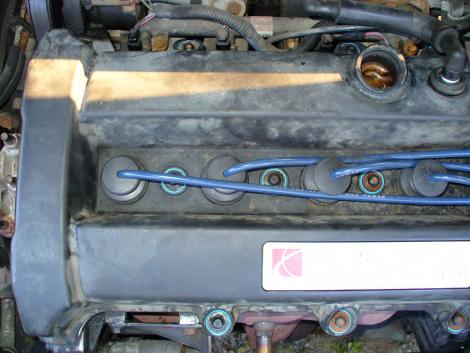
12) Here is another angle of what it will look like properly tightened. My old valve cover was flush with the head which shows how warped it must have been, considering this one is a more uniformly even spacing all around.
13) Now put those boots back on your spark plugs and reconnect the hose, pcv valve and then your negative battery connection.
14) Then let your car sit for 24 hours so your rtv will fully cure. Once thats done, put in 4 quarts of oil and test the car for leaks.
I just did this job yesterday and put oil in around 6 tonight. It looks like everything is holding up well. But I'm still keeping my eyes open for leaks. Hopefully I won't come across another problem related to this. x_x



2 Comments
Recommended Comments